A wood fence is an excellent way to add privacy and beauty to your property. It also provides a sense of security, which can be important in neighborhoods where crime rates are high.
Unfortunately, fences will eventually need repair or staining due to the environment that they are exposed to on a daily basis.
This blog post talks about 9 steps you should take when preparing for and then staining your wood fence!
Step 1: Get the Supplies
The first step in the process of staining your fence is to gather supplies.
You will need the following items:
- A paintbrush,
- Stain or wood sealer
- Drop cloths
- Gloves are recommended for safety purposes
Step 2: Remove Wood Siding That Is Damaged
If there is any wood siding that is damaged or rotting you will need to remove it before staining. This is also a good time to replace boards if there are some missing ones that should be in the fence.
Step 3: Removing Old Stain
Preparing your wood fence for staining involves providing an even surface for the stain to adhere to. If the wood is rough, use sandpaper or a wire brush in order to smooth out the surface of your fence boards. It’s best if you wear gloves at this time since it can be rough on your hands and fingers.
Prior to staining your fence, you must make sure that the previous stain is completely removed. It will not be possible to get rid of all old stains by simply sanding or power washing.
You need a chemical stripper for this part and there are many available on the market today. Follow manufacturer instructions when using chemicals such as these.
If you have used a chemical stripper, make sure to rinse the fence clean with water after it has been applied. Then let it dry completely before moving on to the next step.
Removing the old stain will also give you an idea about how much wood has been exposed and what type of repair work needs to be done if any. You may have rotted boards that need replacing or termite damage that must be repaired prior to staining your fence.
Either way, knowing this information before you begin work is quite advantageous.
Step 4: Use a Power Washer
Before staining a wood fence, you need to make sure that the surface is clean and dry. You can do this by lightly washing it with an all-purpose cleaner or soap.
You will need your power washer for this part and there are two methods that can be effectively utilized in order to remove old stains. Always use low-pressure methods when dealing with a wooden deck surface of any kind. Do not apply too much pressure when using the hose, as this can cause the wood to warp.
First, you can use a fan-tip nozzle that allows the water to come out in a concentrated stream. This will help dislodge any remaining stain and allow it to be rinsed away from the fence surface.
The second method is using an adjustable tip or creating your own spray pattern by bending the metal hose adapter at different angles. This will allow you to control the amount of water pressure that is being applied.
Once the surface has been blasted clean with water, allow it to dry completely before starting on your new stain job. Do not apply anything until you are certain all of the old products have been removed.
Step 5: Use a Hard-Bristle Brush
If there are stubborn stains remaining on your fence, a hard-bristle brush may be used in order to scrub them away. The idea here is not to remove all the paint or stain from the boards but simple enough so that new coats can adhere correctly.
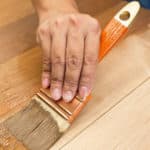
Step 6: Apply Stain To Your Wood Fence
Once you have prepared your wood fence, it is time to apply the stain or sealer. You can use a paintbrush for this if you wish, but many people prefer using an airless sprayer that works very quickly and efficiently.
Make sure that your wood fence dries fully before continuing with staining.
If you did not apply enough or any stain the first time around, it is a good idea to do so now. Apply another layer of stain in order to ensure that your wood fence has an even appearance and coloration.
Step 7: Remove Drops Of Stain That Have Accidentally Fallen On The Ground Or Siding
Many people will run into the problem of having some drops of stain on either their siding or driveway. To remove these stains, use a rag with water and apply it directly to the spot until it is removed.
Step 8: Let The Stain Dry Completely On Your Wood Fence
At this point, your wood fence needs to dry for approximately 12 to 24 hours. The time period depends on how much water is in the wood and the type of stain or sealer that you used.
If your fence does not dry after this amount of time, it can be a sign that moisture is still inside the boards so you should repeat the steps above until they are completely dry before moving forward.
Step 9: Clean Up The Area Where You Stained
Once your wood fence has fully dried, it is a good idea to clean up the area where you stained it and removed any items that could have gotten a stain on them. Sweep away debris from the ground and wipe down tools or anything else that may have been exposed in order to prevent staining.
Conclusion
After reading this blog post, you should have a better understanding of how to prepare and stain your wood fence. There are a few key factors that will help make the process go smoothly such as cleaning the surface thoroughly before staining it with a pristine coat.
If you want more information on these steps or how we can do that for you, reach out. We’ll be happy to answer any questions!