Cutting a square hole through a piece of wood is not difficult but cutting it square so that all four sides are exactly the same length can be more challenging at first glance! In this article, we will show you how to cut a square hole through your material, with precision and safety.
Tools Requirement
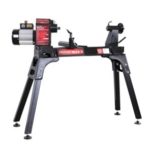
The tools required for cutting your square hole in wood are:
- Tape measure Drill (variable speed)
- Drill bit (for drilling holes)
- Saw blade (to make the cuts)
- Square Clamps Safety gear such as gloves
Step 1: Measure the Size of Your Holes
Before you can start cutting your square hole in wood, there is one thing that must be done. You need to measure the size of your material. If both sides are different sizes then this method will not work. But if they are approximately the same length, we can use a simple trick.
Using the square and clamp, measure each side of the board using your tape measure. You should have a measurement something like “50 cm on one side and 49 cm on another”. This difference will be due to minor variations in position from when you made those two measurements (unless they were taken more than six inches apart!).
The important thing is that the difference is not too great. If it is, you might want to use a different method because this one requires two sides of equal length.
When you have these figures, we can start cutting our square holes in the wood so that they are all exactly (or very nearly) the same size. This step will be much easier if we drill some pilot holes first; although this is optional if your saw blade has a sharp point!
Step 2: Drill Your Pilot Holes
Rectangular clamps make this task much easier because they stop the edges of your material from moving around when you are drilling/sawing.
You can use an electric-powered drill (variable speed) with a 2.5mm bit. If your material is harder, you may need to use a bigger bit or perhaps one which has a point to help guide the hole for when you start cutting your square holes in wood. Otherwise, the blade may snag on the material.
Step 3: Saw Out Each Side of Your Shape
Next, you need to saw out each of these quadrants into separate pieces using your saw blade and clamp. It isn’t really difficult, but you do need to take care not to damage yourself or the material in any way.
Also, you need to be careful not to cut outside your marked line as that could cause serious problems (such as cutting through where another piece is supposed to go) and leave you with a wonky hole or worse! Just use your square and check against it frequently while sawing.
Step 4: Work Out If All The Pieces Are Equal Length
Once you have each piece of the triangle separately, it’s time for the last step – ensuring that each one is equal in length. If they aren’t, stick them back together and try again until they are.
This will make your final project much better looking! You can also round off the edges here if required, either using sandpaper or a saw.
Once this step is done, you can start sticking them together to make your square holes in wood!
How much does it cost?
The cost of making a square hole depends on what kind of tool you use and how large the hole is. A jigsaw might make a nice small hole that would look great on an outboard motor turned into furniture while a CNC router could cut a perfect square hole in the middle of an antique table.
The only issue is what you want to do with the resulting workpiece — if you need precision, then it’s usually best on a CNC router or similar machine.
For some applications, like cutting out a piece of plywood for a sign or picture frame where the edges are not visible, the jigsaw might be great enough — especially if it was done before other steps were taken.
For instance, say you’re cutting out decorative letters from 1/4-inch plywood and your project absolutely must fit perfectly into its frame and have 90-degree corners at each end. It would be easier to cut your letters freehand or use templates and hand tools rather than trying to drag a jigsaw around some curves.
All you need is about 10 inches of depth clearance and you can square cut on most table saws and band saws, but it’s easiest with a router table.
A good router makes quick work of making perfect squares that are more than large enough for almost every application where the corners matter — table toppers, tabletops, or even decorative panels like these. Installing one in your table saw will make cutting squares much easier too.
The best tool for any job depends on what the workpiece will be used for when it’s finished. It could go from having to perfectly fit into its frame to needing only 90-degree intersections without interference between two pieces being joined as long as they’re squared off.
When the workpiece will be screwed to something else or assembled with other components, it’s usually best to make the holes and/or joiners fit perfectly when everything is ready.
It won’t make a difference if you round over corners on an outboard motor but it can mean the difference between success and failure when building cabinets or other large wood projects where one part of a joint move against another.
When you want precise results like these, use a CNC router A jigsaw might be good enough for this miniature version.
Milling square-bottomed mortises in tenons are easier than squaring wide round mortises while leaving their sides long so they can be cut square afterward. If all four inside faces were milled at the same time, you’d have to make sure that three of them were perfectly square and 90 degrees to each other after they were cut.
How Easy Is It?
Most woodworkers are comfortable cutting squares or rectangles freehand, regardless of whether they’re going to be used for joints in furniture or just decorative details on picture frames and cabinets.
Although there’s no need for precision with a jigsaw if the holes won’t be visible, templates can help with getting straight cuts without needing more than an X-Acto knife to clean up afterward. Still, assuming you don’t need your workpieces to fit tightly into their intended places in larger assemblies, there are tools that can make perfect cuts faster than any handsaw could do them.
How Much Time Do I Need?
The fastest way to get a perfect square hole is with a router and template. Since most band saws have tables less than 12 inches deep, you’ll want to use a table saw for cutting the slots in long workpieces if they’re more than 10 inches wide and up to 18-inches or so high — it’s quick, accurate, and doesn’t require any sharpening.
When you want straighter cuts at 90 degrees from each other without needing to change the fence every time, these are useful tools that cut quality joinery quickly.
If your top needs an octagon or circle instead of a square hole, this jigsaw tip could help You can still use it on smaller parts because you’ll only need to repeat the steps once
For most beginners, even a small router table is more than they’ll ever want to tackle — it doesn’t take much time or effort for any of these methods to cut holes that are almost as quick and easy as plugging them.
You can still use a handheld jigsaw too if you don’t need workpieces longer than 18 inches so it’s not necessary to use one machine instead of another unless you’re looking for perfect accuracy.
Using the template system can turn it into a jigsaw-like tool. Cut the slots in each piece and then move everything back into place on top of your scrap wood with a thin layer of glue applied to all edges. Make sure not to apply too much or the pieces will bond too tightly — open slots like these might make your work difficult if you want to cut octagon-shaped holes in thicker panels.
What is the Best Equipment?
You can use a router or table saw jig for most of these steps. You don’t have to buy very much, but it will cost more than a portable drill press unless you get one intended for woodworking rather than metalwork (portable routers are usually capable of cutting plastic, and some can cut aluminum).
The switches are designed not to be used by anyone without fingers so children should never try running one.
Woodworkers can make perfect cuts easily with routers or jigsaws if the parts are small enough to fit on the table.
Even a pocket hole jig requires more work than it should, but you do get good results even when using one — the ones that don’t sand as well contain aluminum and plastic which will melt, so avoid them at all costs.
You can also use a drill press for some of these tasks. It’s best-suited for cutting slots unless you find an inexpensive model that tilts and has top accessories available, but those aren’t as precise as other tools because they’re not made for high-speed cutting — this is why they’re usually used only by hobbyists.
Open Cuts vs Enclosed Holes
If you want to make a cut in the middle of your workpiece, it’s easiest to use a router table if your template is small enough. It doesn’t matter what they cost or how difficult they are to use, all that matters is whether you can complete the task easily and quickly.
If you don’t know much about these tools, every time you change their bit or a guide-bush for cutting depth may fall out, making them hard to reinstall since there’s no way of knowing where everything goes when you open the collet or replace the bushing first.
Using a jigsaw instead of a coping saw helps keep your fingers safe, but if you’re cutting large holes in thin panels it will be difficult to work because there’s no room for the jigsaw to tilt.
Router or Table Saw?
When the parts are small enough to fit on your router’s table, it’s easier to just use that tool. You can make a jigsaw-cut template by putting the workpiece face down in front of a miter slot and tracing around the edge with a pencil.
This will give you a good starting point for cutting out square holes. Use any scrap material you have available for this—I like using 1/4-inch plywood because it has perfectly straight edges and doesn’t splinter as easily as thicker materials do when cut with a coping saw (the best way to cut irregular shapes).
Using these methods is especially useful if you’re working on something that must be finished perfectly because these tools give you results that fit inside a template.
If your workpiece is too big to use in your router table or jigsaw requires more time, you can use a coping saw instead if the part will allow it .
If you’re working with steel or aluminum, make sure your cutting blades are thin enough and sharp (most problems occur because teeth aren’t sharp) so they cut quickly without deflecting.
The same goes for plastic: make sure it’s soft enough that you can cut through it smoothly or you’ll spend all day doing nothing but making adjustments which are normally unnecessary while working with materials softer than these.
Keyhole vs Slot Style Cuts
For keyhole cuts, drill holes on either side of where the hole will be placed and then join them with a drill bit that’s the same diameter as your router bit. This is helpful because it will let you use fewer passes to cut the hole.
Keyhole styles are good for locking in small hardware. If you wanted to lock in screws instead they’d have almost a full inch more to go into the frame — that would make assembly a lot easier, especially if there were multiple parts holding each other together because each part could be locked in at different levels depending on its size.
Cutting off corners makes things easier too. Instead of using many small cuts, you can just make one large cut around the entire perimeter and then use my coping saw to finish the inside.
You can cut the inside faster than the outside because when a piece is already cut off, it’s much easier to get accurate results.