Cutting metal can be a difficult task to undertake, but with the right tools and knowledge, it is not as hard as you might think. In this article, we will be discussing 10 ways that people have used to cut metals quickly and efficiently.
Whether you need to make some cuts for an art project or just want to get rid of some scrap metal, these tips should help improve your process immensely.
Contents
Preparation: Wear Protective Gear
You should always wear protective gear when using any of the tools below. This includes gloves, safety glasses, and hearing protection. In addition to these protective pieces of equipment, you should also cover the surface that you are working on with a drop cloth or other makeshift work area.
This will protect your workspace from particles that might fly off during the sawing process, ensuring that you are cutting metal fast and efficiently.
Step 1: Cut Through Metal Using a Plasma Torch
If you are looking to cut through metal quickly, but do not have access to power tools or if the material is too hard for other cutting methods, plasma torches might be your best bet.
A plasma torch or plasma cutter is a handheld device that uses extremely hot ionized gas to cut through the toughest metals in a fraction of the time that other cutting methods take.
This is very helpful when you need precise lines or straight cuts. This is perfect for art projects or if you have some metal parts needlessly taking up space.
If you are cutting metal with a plasma torch, it’s important to be mindful of the environment where you are cutting. The process of cutting metal might cause some pollution around you, so make sure you do this inside or in an enclosed space.
If you need to cut more than one piece of metal, always make sure the metal is grounded; if not, it could arc and cause an electrical fire. To start cutting, use the nozzle to start heating up the metal.
As it heats up, place your object on top of it and let the heat work its way through the steel. When the metal is hot enough (usually red hot), carefully withdraw the object, then pull away from the nozzle with your object firmly in hand to avoid damaging the edge of your steel.
Step 2: Use a Miter Saw
A miter saw is an ideal piece of equipment for cutting metal. Most models come with the basic features and accessories that you need to cut metal quickly and easily.
Here is what you need to do:
- Remove any excess material from your work surface. Being able to move freely is key to avoiding injury and ensuring precision cuts. Place the work surface at a right angle to the length of your saw blade.
- Place your metal on the work surface and position it so that one edge of it will run parallel to the edge of the table top. Position two stops at either end of this edge, lining them up with the ends of the saw blade. Place these stops at a distance equal to the length of metal that you want to cut.
- Now, lock down your work piece using these stops – this should prevent it from slipping during your cuts. Keep in mind that anything not secured by one or both of these stops may be thrown off course during cutting.
- When you are ready for cutting, pull the trigger on your miter saw to activate it. Now, slowly begin moving the blade towards you along this section of metal – quickly following through with each cut so that no part is left uncut.
- Remember not to push too hard against either side of the work piece! Doing so can cause unwanted movement and may result in less than perfect cuts.
- Once you are done, turn off the saw completely and wait for it to stop rotating before removing your work piece from its resting place. You should then inspect the cut thoroughly – if anything seems out of alignment or has any jagged edges, file them down immediately. This will ensure that they do not pose a threat to your safety, and that everything will go smoothly.
- Finally, take time to clean the area thoroughly before you begin working again – metal pieces may fly out during cutting or become stuck in cracks if left unattended for too long.
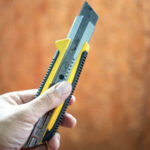
Step 3: Use Tin Snips to Cut Sheet Metal
A tin snip is one of the handiest tools to have around when cutting metal. Tin snips are designed with a cutting edge made of tempered steel, allowing them to easily cut not only thin sheets of metal but also thicker metals like pipes and sheet metal.
If you are looking for a fast way to cut metal, but do not have access to any power tools, tin snips might be the perfect option. These hand-operated shears can make quick work of sheet metals and other thin materials.
Grip the handle of your tin snips tightly in your palm and place the blade against the thickness (edge) that you want to cut. Use an even pressure on both sides of the blade to make your cut.
They come in a variety of different sizes, so be sure to use the appropriate one for your project.
Step 4: Use a Bolt Cutter
If you need to cut thicker pieces of metal quickly and easily, look no further than bolt cutters. These tools can make quick work out even the thickest rods and bars with very little effort.
Many companies use large bolt cutters to break down their scrap metals for recycling, which makes them perfect options if you are looking for a quick way to get rid of your old metal.
Step 5: Use An Angle Grinder with Cutting Discs
If you need to make quick work out of any metal project, then look no further than your standard cordless angle grinder. These handheld devices can be used for a wide variety of projects and are perfect if you don’t want to invest in heavy-duty power tools or spend hours on end cutting through thick material with tin snips and bolt cutters.
Angle grinders can be used with a wide variety of attachments, including cutting discs that work to slice through even the thickest rods and bars in just minutes.
These powerful tools, which resemble a huge electric saw blade, can be used to cut through all sorts of metal in just about any shape imaginable.
The only downside?
They are very loud and require a lot of time investment before you have even completed your first cut. But if you need precision cuts fast, you really can’t go wrong with an angle grinder.
Step 6: Use a Table Saw
The table saw is a very helpful tool in cutting metal quickly. The cuts will be accurate since you can control the blade depth and angle from the table.
The first step is to prepare the metal. This may include cutting it down to size, filing it to remove sharp edges, or scaling it up or down in size. You can use a bench grinder for this step.
Next, set up the table saw for your project. Measure two points on the piece of metal – one closer to the blade and one farther away from the blade – then use a straight edge to connect them with a pencil.
The cut should be 1 inch long at this point. If you want your cut to be longer, make sure you measure and mark accordingly. Mark an “X” on the scoreline (the marked-out line) using another pencil or chalk, then take your metal over to the saw.
Set your blade at the desired depth and height by loosening or tightening the screws until it lines up with your project’s reference line.
Attach a sturdy board below where you want your cut to be made by connecting it to two hinges that are going to support your weight while you’re cutting.
Set the fence so that it is parallel with your cut, then use an adjustable square to make sure the blade is perpendicular to the table itself. This will ensure a straight and accurate cut. You can now turn on your saw before slowly lowering it onto metal until all four corners of your score line are touching the teeth in your blade.
Press down with both hands on the metal, then move it back and forth to make sure that you are making contact between your score line and blade. Make an attempt to cut all of the ways through.
If this does not work, slightly raise up to either end until you can continue cutting without too much resistance. Once finished, turn off your saw and use a hammer to tap the cut metal until it breaks.
You can now file down any rough edges or jagged corners that may have been created by your cut. Be careful not to let these sharp pieces of metal come into contact with skin. You may also want to make sure you check all visible seams for imperfections as well.
If you are satisfied with the result, congratulations! You have just cut metal using a table saw.
Step 7: Use a Hacksaw
It’s important to always file down the blade before using the hacksaw to make sure that it will cut through the metal cleanly and quickly. This can be done with a piece of sandpaper or a file.
When sawing, make sure that you keep even pressure on the blade and use fast strokes to reduce blade-catching and increase efficiency.
Here are the steps to cut metal with a hacksaw:
- File down the blade of the hacksaw. This ensures that it will cut through the metal cleanly and quickly.
- Hold the blade perpendicularly against your work piece and ensure that you maintain even pressure as you saw back and forth.
- Cut in long, smooth strokes that are as fast as possible.
You can then use a metal grinder to finish the cut if you need it to be any straighter or smoother. Using this method, there’s no reason why you should have trouble cutting through your chosen material quickly and efficiently.