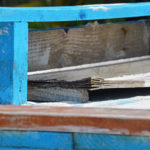
Polyurethane is a synthetic varnish that hardens over time, making it nearly impossible to remove without destroying a piece of furniture entirely. The projects you make out of wood and the furniture you decorate your home with have some level of polyurethane protection on them.
Is it possible to repaint any surface that’s been coated with polyurethane? If you have a water-based or oil-based paint, yes, but if the old coating is an oil-based polyurethane, forget about it.
What is Polyurethane?
Polyurethane is a fantastic finish. It’s durable, protects against moisture and mildew, and is easy to apply. In its various forms, it is easily the most popular finish for wood furniture and cabinetwork today. The three popular brands are Minwax, Varathane, and Watco.
When you walk into a home improvement center or lumberyard, cans of poly are everywhere. And with good reason. When it comes to durability, polyurethane is hard to beat.
Most woodworkers have had at least one experience with polyurethane. Maybe you bought a new piece of furniture and the finish didn’t meet your expectations, or maybe you decided to make your own table and found that applying poly was more trouble than it was worth. Maybe the finish didn’t look good, or peeling and cracking were problems.
Whatever the reason, if you’re trying to sand out a polyurethane finish, you’ll need to know how tough that finish is before deciding whether to go to all the trouble.
Types of Polyurethane
There are several different types of polyurethanes, but only two are in common use for wood finishes – oil-based and water-based. The old standby is oil-based polyurethane.
It’s a finish that was popularized by General Finishes about 20 years ago, and it was used to finish more woodworking projects in the 1990s than any other type of finish. Oil-based polyurethane is also the most difficult to remove.
Differences Between Water-Based and Oil-Based Polyurethanes
Water-based finishes are easier to apply but have slightly less durability than oil-based polyurethanes. Early water base polys weren’t as tough, and they tended to yellow over time. But the newest water-based polyurethanes are very good finishes. They’re easy to apply with a brush or sprayer and don’t contain solvents that can harm woodwork in contact for long periods.
Oil-based polyurethane is the toughest finish to sand. It’s also the hardest finish you can apply by brush, although there are a number of companies selling spray equipment for oil-based polyurethanes.
That toughness makes polyurethane a great choice for protecting floors and other surfaces where abrasion or abuse can be an issue.
Water-based polyurethanes are much more sandable than oil-based finishes, and the latest water base urethanes require fairly aggressive sanding to remove them. As with oil base, it’s easier to spray water-based polyurethane than apply it with brushes.
All finishing products wear out. The polyurethane finish on your piece of furniture has a life expectancy that’s extended by regular cleaning and recoating, but someday the finish will need to be removed and replaced.
It’s reasonable to assume they’ll last from 10 to 20 years, depending on how they’re applied and maintained.
If you have questions about how difficult it will be to remove a finish, contact the manufacturer. Most finishing companies know very little about other products. That’s because each company follows its own formula for creating finishes but they all should be familiar with their own products.
If you’re trying to decide whether they want to sand their finish or replace it, follow the two guidelines:
- If it’s an old oil-based polyurethane, forget about removing it.
- If it was finished with water-based polyurethane and you’re not happy with the results, consider removing the finish and refinishing it. It’s not a big job, but it will take some time and energy.
How to Paint Over Polyurethane?
If you want to alter the gloss level or color of a polyurethane finish, or you want to change its sheen from flat to satin or high gloss, follow the methods below.
Method 1: Use a Coat of Lacquer
The easiest way to paint over polyurethane is with a coat of lacquer over the polyurethane. This can be done at any time after the polyurethane has dried and before it has fully cured.
That usually means you have to do it within about a week after application. All you have to do is apply the lacquer over the polyurethane with either an HVLP spray gun or a hand brush, and then quickly wipe off all surfaces with a rag wetted in lacquer thinner.
The next day, sand lightly with very fine-grit sandpaper and apply a few more coats of lacquer, all in the same manner. Because you don’t have to sand between the first and second coats of lacquer, this method goes very fast.
It is even possible to go from polyurethane directly to high-gloss lacquer simply by stacking the coats (two or three of polyurethane followed by several of lacquer), which doesn’t give the polyurethane enough time to fully cure. This is an excellent process for doing door and window frames, the inside of drawers, and other tight areas where it would be difficult to spray with lacquer.
Method 2: Use a Solvent Stripper
You can use some type of solvent stripper to remove the polyurethane. However, it is not safe to do because of residual solvents in the wood that will be drawn back into the surface again as moisture gets into the wood over time.
Wipe on the Citristrip. Apply light coats and wait 30 minutes or longer between each coat until all of the old finish is stripped. If the wood is extremely porous, you may have to sand between coats with #320- or #400-grit sandpaper.
The finish is removed in about an hour. You are simply dissolving the finish chemically. Be sure to use rubber gloves and a respirator, as this product releases powerful fumes. After all of the old finish has been removed, rinse the wood well with plain water until it runs clear, then wash off thoroughly with mineral spirits and let dry overnight.
Sand the surface lightly with fine-grit sandpaper and wipe it clean with a rag dipped in lacquer thinner before applying your second coat of lacquer or another sealer.
Apply two more light coats (two if you’re using a satin lacquer, and three if you are using a gloss finish) with an HVLP spray gun or a good-quality hand brush. The next day, sand lightly with #320- or #400-grit sandpaper and apply two more coats of finish.
After the final coat has dried thoroughly, use fine-grit sandpaper to lightly scuff all surfaces to prepare them for a paste wax finish. Then apply paste wax with a clean buffing pad, such as those used on electric polishers. Avoid using old pads, because they can contaminate the wax.
Buff for a few seconds on each section until it is dry and brilliant. Carefully buff around the edge to avoid smearing of the wax or overworking any area of finish. Let dry about 15 minutes before handling, and buff again if necessary.