Pine is a common wood used in the construction of homes, fences, decks, and other structures. Painting or staining pine lumber can add years to its lifespan. Pine is also inexpensive and easy to work with. It’s not uncommon for homeowners to make their own furniture or other crafts out of pine lumber.
But before you start painting your project, it’s important to take some precautions so that you get the best possible result from your paint job. In this article, we will discuss 15 tips that will help you paint and stain pine lumber like a pro.
Contents
Tip 1: Make Sure the Wood is Clean
First, you need to remove any dirt or debris from the surface of your project piece by using water and a rag. Next, if there are stubborn stains on your pine lumber, use soapy water along with an old toothbrush to scrub it away. Dry off the stain afterward with a rag.
Tip 2: Stripping Old Paint and Stains Before Starting Your Project
Pine is inexpensive but not cheap enough to warrant spending money on it twice. Before applying new coats of paint or stain, you should strip the current coatings off using a chemical stripper.
Tip 3: Sand the Wood Until It’s Smooth and Clean
You may need to use coarse sandpaper on any stubborn grooves or stains, but make sure you don’t damage your project piece in the process. A finer grit of sandpaper is then used to create a smooth surface that will let the paint adhere well later. Be careful not to sand through your wood.
Tip 4: Applying a Paint Conditioner to the Wood
A good quality brush-on primer will allow your new coats of paint or stain to bond properly with the old coatings, increasing durability and resistance to chipping and peeling. Brush on all surfaces except for knots in pine lumber that are more than one inch thick.
Tip 5: Find a Suitable Paint or Stain
You can’t just use any type of paint and expect it to work on pine lumber. There are specific paints and stains made for painting wood, so make sure you get the right stuff. It’s also important that the paint is compatible with other types of finishes such as varnish or lacquer.
Tip 6: Priming and Painting Pine Lumber on all Sides
It is important to paint or stain the front, back, and edges of your project so that it looks professional and attractive from all directions when you’re done. Paint one side at a time, using multiple coats where needed until each surface has an even, smooth finish.
Tip 7: Applying More Than one Finishing Coat on Top of Each Other if Necessary
If you are using light-colored wood like pine lumber and want some color added to it, consider using a dark stain instead of opaque paint. But make sure to apply more than one coat if you want the color to show up fully and evenly.
Tip 8: Using the Right Brushes for Applying Oil Based Paints or Stains
Before staining your pine lumber with paint or wood conditioner, be sure to use a brush that is designed for oil-based products. These types of paint and stain can dry out bristles in your old brushes pretty quickly, so be sure to invest in some new ones if you plan on using them often.
Tip 9: Invest in Quality Brushes and Rollers
You can use cheap materials like cardboard or plastic for your tools, but the paint job won’t look nearly as good. If you don’t want to spend a lot of money on new equipment, consider borrowing these items from friends or family members.
They will be much more likely to lend them to you if they know that you’ll be taking good care of them. You can also find inexpensive supplies at the hardware store; just make sure not to skimp on quality.
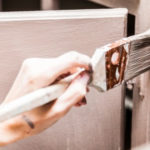
Tip 10: Use Brushes When Painting
Painting with a brush will give you better control over your strokes than if you were using a roller or spray can. You can also use a paintbrush to achieve certain effects on your project piece, such as giving it an aged look by painting in some darker and lighter spots.
Painting with a brush is more time-consuming than other methods, but the results are worth it.
Tip 11: Using a Paint Roller Instead of a Brush
If you are pressed for time and want to get your project finished quickly, consider using a paint roller instead of a brush. Not only is it easier in most cases when you are painting multiple coats on top of one another, but there’s also less chance for mistakes.
Tip 12: Start at the Lower Half of Your Project Piece
Starting at the lower half of your project piece will help you avoid having paint drip onto areas that are already painted. If there is a certain area where it would be difficult for you to reach, consider using an extension pole attached to your brush or roller.
Tip 13: Use a Paint Sprayer
Paint sprayers can be an effective and efficient way to apply your primer or paint. This method is particularly useful if you are painting large surfaces like fences or decks, but it works well for smaller projects. Be sure to use the appropriate type of sandpaper before applying your materials with a sprayer.
Tip 14: Use Semi-Transparent Stains
If you want more control over how much color is applied to your wood, choose a semi-transparent stain. These stains will be less noticeable on the wood than on opaque versions, but they still provide great color.
Tip 15: Use Painters Tape
Using painter’s tape will give you a nice clean edge around your project piece and prevent paint from seeping onto areas that you don’t want to have color on them.
Conclusion
The best way to paint or stain pine lumber is by following the tips listed in this article. Whether you are a professional painter looking for new techniques, or just an average Joe who wants to spruce up their home with DIY projects, these helpful hints will help you get started.