Wood is an excellent material for many applications. It has a natural appeal to it that cannot be replicated by other materials, and it can be worked in just about any way you want. Despite its advantages, wood does have one major drawback: it isn’t waterproof.
Not only can water damage your beautiful woodwork, but also the chemicals present in some woods (such as cedar) will cause them to deteriorate over time when they are wet.
This article will show you how to apply a sealant so that your wood won’t suffer from either of these issues!
Contents
Step 1: Get Your Materials Ready
- A bucket of clean water
- Some sponges or rags
- Wood sealant that is the same color as the wood you’re working with.
- If there are any gaps in between boards, they should be caulked before applying the sealant to them.
Step 2: Clean Your Wood
Before applying a sealant, it is imperative that you clean your surface so that any oils or dirt are removed. You can do this by using a degreaser and wiping down the area with a lint-free cloth. If there are still some stubborn stains on your wood (especially from oils or resin), you can use a little bit of paint thinner to wipe them off.
If there are any oils or dirt on the surface of your wood, they will prevent the sealant from effectively doing its job and protecting the underlying material.
Clean the wood off with a wet rag or towel. It is important that you use something damp and not soaked, because if the water dries before it has had time to penetrate into the wood then this method will be unsuccessful.
If there are any stains on your work surface from liquids such as coffee, tea, wine, etc., these should be cleaned off before proceeding.
What type of cleaner should I use?
You can use a mild soap and water solution, but in some cases, you might need to use something stronger. For example, if your wood is stained or painted, then it will require more strenuous chemicals than just plain old dish detergent.
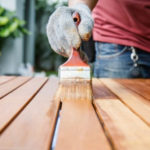
Step 3: Apply The Sealant Of Your Choice
There are a few different sealants that work well for waterproofing wood. Some of the most popular options are epoxy, polyurethane, and shellac.
The first two sealants work by creating a protective barrier on the surface of your wood that seals it against water damage and other environmental threats while also providing an attractive gloss over top for added protection from things like scratches or wear marks.
Polyurethane provides a barrier between the water and your wood, making it more difficult for moisture to seep into its pores. In order to dry this type of coating out after applying it, you’ll want to sand off any excess that may have gotten on the surface.
Shellacs work more like a stain by staining the wood and sealing it at the same time, thereby providing extra protection.
The sealant you use will depend on your preferences as well as what type of wood you are working with. For example, some people prefer shellacs because they provide an attractive look while also protecting against water damage whereas epoxies often provide a more high-gloss finish.
If you want something that will last the longest and take care of both protection as well as an attractive look, then polyurethane is likely your best option.
If you have cedar which naturally repels water but not oil – oils will actually penetrate it more easily than other woods because cedar has an open grain – then you would want to use a sealant that is oil-based.
Apply the sealant according to the manufacturer’s instructions, and allow it plenty of time to dry before using your wood for anything important. You’ll know when the sealant is fully dried because its color will change from clear/white to a yellowish color.
Step 4: Wait
After applying the sealant to your surface, you will need to wait 24 hours before engaging in any water activities in that particular area. This allows the sealant to dry completely, which is important for its effectiveness.
Step 5: Protect Your Wood Once You Seal It
While it’s important to protect your wood before sealing it, there are some important things to keep in mind after you seal it.
For starters, make sure that your wood is not exposed to direct sunlight for extended periods of time. This will cause the sealant to wear away and leave your wood susceptible again until you apply another coat!
Secondly, always wash or wipe down any spills on a surface with water as soon as possible. If you leave them on the surface of your wood for too long, they will seep into it and cause damage.
Step 6: Maintain Your Sealant Once You Apply It
Keeping up with sealants after applying them can be a lot of work! Some people prefer to have their sealant professionally reapplied every year or so to ensure that it is doing its job. You can also use wax on top of the sealant if you want an additional layer of protection.
In other cases, people prefer to reapply the sealant themselves every few months depending on how often they use their wood and exposure to elements like water or sunlight.
Regardless of what you decide for your own needs, make sure you pay attention to any warnings from the manufacturer about when a surface should be sealed. This will ensure that you are getting the most out of your sealant and ensuring it lasts as long as possible.
Step 7: Seal Your Wood Regularly
No matter how much care you take, wood is still porous material so eventually, water can seep in even if a surface has been sealed properly. To make sure this doesn’t happen, you should seal your wood about once every two years or so.
If you’re not sure whether your sealant is still in good condition, some telltale signs to look for are cracking or peeling around the edges of the wood. You can also use a flashlight (with or without a special lens) and shine it on the surface of the wood. If light shines through cracks, then it’s time to reapply!
Conclusion
Protect your woodwork from the damaging effects of water and chemicals with a sealant. It’s easy to apply, looks great, lasts for years and is environmentally friendly. A few quick steps will have you on your way to protecting all of that hard work in no time.
This article has given you the knowledge and tools to protect your woodwork. If you’re interested to know which sealant to use, check out our guide on the best deck coatings and best solid deck stains.