Can you paint over wallpaper? Yes, with some exceptions and considerations. Wallpaper is a great way to liven up any room, but it can be costly and time-consuming to install.
This article shows you how to makeover your walls with simple painting techniques that will give your home a fresh, new look without the hassle of removing the old wallpaper first.
Step 1: Get Ready
The first step is to prepare. Disconnect the power to the room, whether it’s by turning off the breaker or switching off the fuse at the circuit breaker panel.
Open up all of your doors and windows to help ventilate the room while you’re working in it. Clean your walls with a damp cloth or sponge to remove debris or dirt.
Step 2: Prepare Your Space
Next, ensure your surfaces are clean and dry before you begin painting. Spread newspapers in any area you’ll be working so that stray paint doesn’t get on expensive furniture.
Cover floors with drop cloths to protect them from drips and spills while painting.
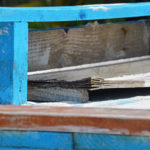
Step 3: Prepare the Wallpaper
Use a steamer to remove wallpaper. This is an option if you don’t want to paint over it and instead would like to use the existing paper as part of your new look.
If this isn’t possible because there’s too much glue or other issues with removing it, then you’ll need to smooth your walls with a joint compound.
Step 4: Prime Your Walls
Prime the wall in a color that closely matches the paint you plan on using for this room, usually white or another light tone.
Use an oil-based primer product if possible because it will cover most stains and imperfections, including glue. Leave it on for the amount of time specified in the product’s instructions before painting over it.
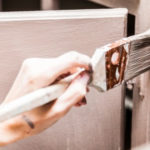
Step 5: Paint
Paint your walls with two coats, following the manufacturer’s directions about drying times between applications. Ensure you get into any corners and crevices to avoid getting paint outside of these areas you don’t want to see on your walls.
Step 6: Seal Your Paint Job
Use a polyurethane sealant to prevent future damage. Apply it with a foam brush, following the manufacturer’s directions about how much time you’ll need before applying another coat.
This will help protect your walls from moisture and other stains that could cause unsightly marks down the road.
Step 7: Let It Dry
Give your paint plenty of time to dry before putting any furniture or other items back in the room. You should wait at least 24 hours, which is how long it takes for oil-based paints to harden completely.
Water-based paints can take up to 48 hours because they usually need more ventilation time.
Step 8: Move Things Back
Re-hang your curtains put furniture back in place and otherwise go ahead with using the room as you normally would in order to give the paint time to set completely before being disturbed again.
This will ensure that it’s permanent once everything is replaced where it belongs. Another thing to be aware of is that oil-based paints are more likely to emit fumes for longer periods of time, so make sure you have adequate ventilation until they’re dry.
Step 9: Clean Up
Don’t forget to clean up your work area when you’re done, putting away drop cloths and other materials that are no longer needed. Sweep or vacuum the floors before washing them with a detergent-based cleaner to remove any dust or debris left behind by this project.
Be sure to take out the trash and recycling when you’re finished.